
The Raspberry Pi 4 and the Commodore 64: A Perfect Blend of Nostalgia and Modern Technology
In the world of technology, there are few things that evoke as much nostalgia as the Commodore 64. Released in 1982, it was a groundbreaking home computer that captured the hearts of millions with its impressive capabilities and vast library of games. Fast forward to today, and we have the Raspberry Pi 4, a small yet powerful single-board computer. But what happens when you combine the two? The result is a perfect blend of nostalgia and modern technology.
The Raspberry Pi Foundation designed the Raspberry Pi series as an affordable computer that could be used for educational purposes and tinkering. Over the years, it has gained a dedicated following due to its versatility and vast community support. With each new iteration, the Raspberry Pi has become more capable, offering improved performance and expanded features.
Enterprising enthusiasts have taken advantage of this versatility by recreating classic computers on the Raspberry Pi platform. One such example is emulating the Commodore 64 on a Raspberry Pi 4. By running specialized software like VICE (Versatile Commodore Emulator), users can experience the magic of this iconic machine on modern hardware.
The Raspberry Pi 4’s impressive specifications make it an ideal platform for running Commodore 64 emulation. With its quad-core ARM Cortex-A72 processor, up to 8GB of RAM, USB ports, HDMI output, and support for various operating systems like Raspbian or RetroPie, it can handle emulating even demanding software with ease.
Emulating the Commodore 64 on a Raspberry Pi 4 opens up a world of possibilities. You can relive your favorite childhood games or explore titles you may have missed out on. The extensive software library available for the Commodore 64 ensures that there is something for everyone – from classic arcade games to educational programs.
But it doesn’t stop at gaming. The Raspberry Pi 4’s capabilities extend beyond emulation. You can connect it to modern peripherals, such as USB keyboards and game controllers, to enhance your Commodore 64 experience. Additionally, the Raspberry Pi’s GPIO pins allow for hardware tinkering, enabling enthusiasts to create their own custom interfaces or even build physical replicas of classic Commodore peripherals.
The combination of the Raspberry Pi 4 and Commodore 64 emulation is a testament to the power of modern technology in preserving the past. It allows us to relive the nostalgia of a bygone era while leveraging the advancements of today’s computing capabilities.
Whether you are a die-hard Commodore fan or simply curious about the history of computing, exploring the world of Raspberry Pi 4-based Commodore 64 emulation is an exciting journey. It offers a unique opportunity to bridge the gap between generations and appreciate both the simplicity and ingenuity of early home computers and the incredible progress made in technology since then.
So, dust off those old floppy disks or cassette tapes, fire up your Raspberry Pi 4, and immerse yourself in a world where pixels were big, sound was bleeps and bloops, and hours were spent exploring virtual realms on a machine that defined an era. The Raspberry Pi 4 and Commodore 64 emulation – a perfect blend of nostalgia and modern technology that brings joy to enthusiasts young and old alike.
8 Essential Tips for Raspberry Pi 4 Commodore 64: Mastering Operating System, Emulator Setup, Keyboard Mapping, ROMs and Disk Images, Joystick Configuration, Display Settings, Audio Configuration, and Save States
- Operating System
- Emulator Setup
- Keyboard Mapping
- ROMs and Disk Images
- Joystick Configuration
- Display Settings
- Audio Configuration
- Save States
Operating System
When it comes to emulating the Commodore 64 on a Raspberry Pi 4, choosing the right operating system is crucial. The operating system you select will determine how smoothly and efficiently your emulation experience will be.
One popular choice for running Commodore 64 emulation on a Raspberry Pi 4 is Raspbian. Raspbian is the official operating system for the Raspberry Pi and offers a user-friendly interface and excellent compatibility. It provides access to various software packages and tools that can enhance your emulation experience.
Another option worth considering is RetroPie. RetroPie is a specialized operating system built specifically for retro gaming emulation. It supports a wide range of platforms, including the Commodore 64, and comes with pre-installed emulators like VICE. RetroPie also offers a user-friendly interface and allows you to customize settings and gamepad configurations easily.
For those seeking a more streamlined experience, there are dedicated Commodore 64-focused distributions available as well. One such example is “Combian 64,” which is built specifically for emulating the Commodore 64 on Raspberry Pi hardware. Combian 64 provides an optimized environment, ensuring smooth performance and compatibility with Commodore software.
Regardless of which operating system you choose, it’s important to keep it up to date by regularly installing updates and patches. This ensures that you have access to the latest features, bug fixes, and security enhancements.
In addition to selecting the right operating system, it’s also essential to have the appropriate ROMs or disk images of Commodore 64 games or software that you want to run. These files can be easily obtained from various online sources dedicated to preserving retro computing history.
Remember that while emulating the Commodore 64 on a Raspberry Pi 4 can be an exciting journey into nostalgia, it’s essential to respect copyright laws by only using legally obtained ROMs or disk images.
By choosing an appropriate operating system for your Raspberry Pi 4-based Commodore 64 emulation and ensuring you have the necessary software files, you can enjoy a seamless and authentic retro computing experience. So, fire up your Raspberry Pi 4, choose your favorite operating system, load up those classic games, and relive the magic of the Commodore 64!
Emulator Setup
Emulator Setup: Bringing the Commodore 64 Back to Life with Raspberry Pi 4
If you’re a fan of retro gaming or simply have a soft spot for the iconic Commodore 64, you’re in for a treat. With the powerful Raspberry Pi 4, you can easily set up an emulator that brings this classic computer back to life.
Setting up the Commodore 64 emulator on a Raspberry Pi 4 is a straightforward process. Here’s a quick guide to get you started:
Get your Raspberry Pi 4: Make sure you have the latest Raspberry Pi 4 model, along with a power supply, microSD card, and HDMI cable.
Choose your operating system: Decide on the operating system you want to use. Raspbian is popular and user-friendly, while RetroPie offers a more gaming-focused experience.
Download and install the necessary software: Visit the official websites of Raspbian or RetroPie to download their respective images. Follow the installation instructions provided to write the image onto your microSD card.
Set up your Raspberry Pi: Insert the microSD card into your Raspberry Pi 4 and connect it to a display using an HDMI cable. Power on your device and follow the on-screen prompts for initial setup.
Install VICE emulator: Once your Raspberry Pi is up and running, open a terminal window and enter the following command:
– For Raspbian: sudo apt-get install vice
– For RetroPie: Use RetroPie’s built-in package manager or follow their documentation for installing VICE.
Obtain Commodore 64 ROMs: To legally use Commodore 64 software, you’ll need original ROM files from games or applications you own. Transfer these files onto your Raspberry Pi’s microSD card.
Launch VICE emulator: Open VICE from either the desktop menu (Raspbian) or the RetroPie interface. Configure the emulator settings, including input devices and display options.
Load and play games: With VICE running, navigate to the directory where you stored your Commodore 64 ROM files. Select a game or application and enjoy the nostalgic experience of the Commodore 64 on your Raspberry Pi 4.
Remember, while setting up emulators is legal, it’s important to only use ROMs for which you own the original copies. Respect copyright laws and support game developers by purchasing legal copies of games whenever possible.
With this emulator setup, you can relive classic Commodore 64 gaming moments or explore software that defined an era in computing history. The Raspberry Pi 4’s power combined with VICE’s emulation capabilities makes for an authentic and enjoyable experience that brings back memories for enthusiasts of all ages.
So, grab your Raspberry Pi 4, follow these steps, and embark on a journey back in time to experience the magic of the Commodore 64 once again. Happy gaming!
Keyboard Mapping
Keyboard Mapping: Enhancing the Commodore 64 Experience on Raspberry Pi 4
One of the key aspects of recreating the Commodore 64 experience on a Raspberry Pi 4 is keyboard mapping. The original Commodore 64 had a unique keyboard layout that added to its charm and functionality. Thankfully, with some configuration, you can replicate this layout on your Raspberry Pi 4 and enhance your nostalgic journey.
When emulating the Commodore 64 on a Raspberry Pi 4, it’s important to ensure that the keyboard inputs are correctly mapped to match the original machine. This ensures that you can fully enjoy classic games and applications that relied on specific key combinations.
To achieve this, you can use software like VICE (Versatile Commodore Emulator) or RetroPie, which provide options for customizing keyboard mapping. These programs allow you to remap keys on your modern keyboard or game controller to match the layout of a traditional Commodore 64.
By mapping keys accurately, you can recreate the feel of using an actual Commodore 64 keyboard. This is particularly important for games that relied heavily on specific function keys or special characters. With proper mapping, you won’t miss out on any of the original gameplay experiences.
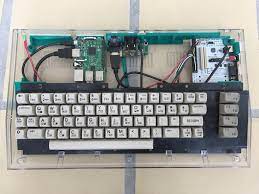
Additionally, some enthusiasts go even further by creating physical replicas of the Commodore 64’s iconic keyboard using mechanical switches and keycaps. This level of dedication truly brings back the tactile feel and authenticity of typing on an original Commodore machine.
Keyboard mapping not only enhances gaming experiences but also allows for easy navigation through various software menus and utilities. It ensures that interacting with emulated applications remains intuitive and seamless, just as it was back in the heyday of the Commodore 64.
Whether you’re reliving your childhood memories or discovering classic computing for the first time, accurate keyboard mapping is crucial for an authentic experience when emulating the Commodore 64 on a Raspberry Pi 4. It’s a small but significant detail that adds to the overall immersion and enjoyment of using this legendary machine.
So, take the time to explore keyboard mapping options available in emulation software and customize your Raspberry Pi 4 setup to match the Commodore 64’s layout. Immerse yourself in the nostalgia of typing on those iconic keys and rediscover the magic of the Commodore 64, all while harnessing the power of modern technology with your Raspberry Pi 4.
ROMs and Disk Images
ROMs and Disk Images: Unlocking the Full Potential of Raspberry Pi 4 Commodore 64 Emulation
When it comes to emulating the beloved Commodore 64 on a Raspberry Pi 4, one essential element is the availability of ROMs and disk images. These digital files hold the key to unlocking the full potential of your emulation experience, allowing you to relive classic games and explore a vast library of software.
ROMs, short for Read-Only Memories, contain the original software code from cartridges or chips used in the Commodore
These files are essential for running games and programs on an emulator. While it is important to respect copyright laws and only use ROMs for which you have legal rights, there are many websites that offer legal downloads of Commodore 64 ROMs.
Disk images, on the other hand, replicate the contents of floppy disks used with the Commodore
These files typically have an extension like .d64 or .g64 and contain everything from game data to operating systems and utilities. Disk images allow you to experience software as it was originally intended, complete with loading screens and disk swapping.
To use ROMs and disk images with your Raspberry Pi 4 Commodore 64 emulation setup, you will need specialized software like VICE (Versatile Commodore Emulator) or RetroPie. These emulators provide a user-friendly interface that allows you to load ROMs or disk images effortlessly.
Once you have obtained your desired ROMs or disk images legally, simply place them in a designated folder within your emulator’s directory structure. From there, you can select them within the emulator’s menu system and start reliving those nostalgic moments or exploring new adventures.
It’s worth noting that while emulation offers a convenient way to experience classic software on modern hardware, it’s important to respect intellectual property rights. Only use ROMs and disk images for which you have obtained legal rights or that are freely available in the public domain.
With ROMs and disk images at your disposal, the Raspberry Pi 4 becomes a time machine, transporting you back to the golden era of the Commodore
Whether you want to play legendary games like “Maniac Mansion” or “The Last Ninja,” or delve into educational software that sparked your curiosity as a child, these digital files hold the key to unlocking a treasure trove of memories.
So, fire up your Raspberry Pi 4, load up your favorite Commodore 64 emulator, and let ROMs and disk images transport you back to an era when pixels ruled and gaming was a true adventure. With this tip in mind, you’ll be well on your way to creating an immersive Commodore 64 emulation experience that captures the essence of this iconic machine.
Joystick Configuration
Mastering the Joystick Configuration on Raspberry Pi 4 for Commodore 64 Emulation
One of the joys of emulating the Commodore 64 on a Raspberry Pi 4 is reliving the experience of using classic joysticks to play your favorite games. However, configuring and mapping these joysticks can sometimes be a daunting task for newcomers. Don’t worry, though – we’re here to help you master the joystick configuration process and get you gaming in no time!
Firstly, it’s important to note that the Raspberry Pi 4 supports a wide range of USB game controllers, including classic-style joysticks. To begin, ensure that your joystick is connected to one of the USB ports on your Raspberry Pi 4.
Next, you’ll need to access the RetroPie configuration menu. This can be done by pressing F4 on your keyboard or by navigating to the RetroPie menu in EmulationStation and selecting “RetroPie Setup.”
Once in the RetroPie configuration menu, choose “Configuration/Tools” followed by “RetroArch Configuration.” This will open up a new menu where you can configure various settings related to emulation.
In this menu, select “Input” and then “Input User 1 Binds.” Here, you’ll find options to map each button on your joystick. Follow the prompts provided on-screen to assign buttons for actions like Up, Down, Left, Right, Fire/Select, and any additional buttons your joystick may have.
To make things easier during gameplay, it’s recommended to map additional buttons such as Start or Pause as well. This way, you won’t have to rely on keyboard inputs while playing Commodore 64 games.
Once you’ve completed mapping all necessary buttons, exit the RetroArch Configuration menu and return to EmulationStation. Now it’s time to test out your newly configured joystick!
Launch a Commodore 64 game from within EmulationStation, and you should be able to control it using your joystick. If any buttons or directions aren’t working as expected, you can revisit the RetroArch Configuration menu and make adjustments until everything is to your liking.
Remember, practice makes perfect! Spend some time experimenting with different games and configurations to find what works best for you. You may even discover hidden gems or uncover new ways to enjoy classic Commodore 64 titles.
With a bit of patience and the right configuration, you’ll soon be immersed in the nostalgic world of Commodore 64 gaming on your Raspberry Pi 4. So grab your joystick, power up your Raspberry Pi 4, and get ready to embark on a journey back in time – where pixels ruled and joysticks were the ultimate gaming accessory!
Display Settings
Fine-tuning Display Settings for Raspberry Pi 4 Commodore 64 Emulation
When it comes to emulating the beloved Commodore 64 on a Raspberry Pi 4, one crucial aspect that can greatly enhance your experience is optimizing the display settings. By fine-tuning these settings, you can achieve the best visual output and make your trip down memory lane even more immersive.
First and foremost, it’s important to ensure that your Raspberry Pi 4 is connected to a compatible display device. The Raspberry Pi 4 supports HDMI output, so connecting it to a modern television or monitor with an HDMI input will provide the best results. Make sure to use a high-quality HDMI cable for optimal signal transmission.
Once you have your display connected, accessing the display settings on your Raspberry Pi 4 is straightforward. In most cases, you can navigate to the “Configuration” or “Display” section in your chosen operating system’s settings menu. For example, in Raspbian, you can find these options by clicking on the Raspberry icon in the top-left corner of the screen and selecting “Preferences” followed by “Screen Configuration.”
Within the display settings menu, you’ll find several adjustable parameters that can significantly impact your emulation experience. Here are a few key settings to consider:
- Resolution: Choosing an appropriate resolution is essential for achieving crisp visuals. The native resolution of most modern displays is typically recommended (e.g., 1920×1080). However, if you prefer a more authentic retro feel, you might opt for lower resolutions that mimic the original Commodore 64’s output.
- Aspect Ratio: The original Commodore 64 had a screen aspect ratio of approximately 4:3. To maintain proper proportions and avoid stretching or squishing images, select an aspect ratio that matches this standard.
- Overscan: Some displays may have overscan enabled by default, which can crop parts of your screen. Disable overscan to ensure that the entire Commodore 64 display is visible.
- Refresh Rate: The refresh rate determines how many times the display updates per second. For most users, a standard 60Hz refresh rate should suffice. However, if you’re experiencing screen tearing or other visual anomalies, experimenting with different refresh rates may help.
Remember to save your changes after adjusting the display settings to ensure they take effect. It’s also worth noting that some operating systems may require a reboot for the changes to be applied.
By taking the time to fine-tune your Raspberry Pi 4’s display settings for Commodore 64 emulation, you can optimize the graphics and create an authentic retro experience. Experimenting with different resolutions, aspect ratios, and other parameters allows you to find the perfect balance between nostalgia and modern visual quality.
So, go ahead and dive into your favorite Commodore 64 games and programs on your Raspberry Pi 4, armed with these display settings tips. Enjoy reliving those classic moments while marveling at the power of modern technology!
Audio Configuration
Audio Configuration: Enhancing the Commodore 64 Experience on Raspberry Pi 4
When it comes to emulating the iconic Commodore 64 on a Raspberry Pi 4, audio configuration plays a crucial role in creating an authentic and immersive experience. By fine-tuning the audio settings, you can enhance your journey back to the golden age of computing.
The Raspberry Pi 4 offers various options for audio output, allowing you to choose between HDMI, USB, or the built-in 3.5mm audio jack. Each option has its advantages, so it’s worth exploring which one suits your setup and preferences best.
If you’re connecting your Raspberry Pi 4 to a TV or monitor with built-in speakers via HDMI, using HDMI audio output is the simplest choice. This ensures that both video and audio signals are transmitted through a single cable, providing a hassle-free setup.
On the other hand, if you prefer using external speakers or headphones for better sound quality or privacy, utilizing the USB or 3.5mm audio jack is recommended. The USB option allows you to connect USB speakers or an external DAC (Digital-to-Analog Converter) for improved audio fidelity. Meanwhile, using the 3.5mm audio jack grants you flexibility in connecting various analog audio devices.
To configure your preferred audio output on Raspberry Pi 4 running Commodore 64 emulation software like VICE, start by accessing the RetroPie menu or opening a terminal window if you’re using Raspbian. From there, navigate to “Audio Settings” and select your desired output device.
It’s also worth mentioning that adjusting volume levels can greatly impact your overall experience. Some emulators provide dedicated volume controls within their settings menus, while others rely on system-level adjustments. Experimenting with different volume levels will help you strike a balance between preserving authenticity and ensuring optimal listening pleasure.
Furthermore, if you encounter any issues with distorted or crackling sound during emulation, adjusting the audio buffer settings can often resolve these problems. Increasing the buffer size can help mitigate audio latency and improve overall sound quality.
Remember, every setup is unique, and personal preferences vary. Don’t hesitate to explore different audio configurations and fine-tune them to suit your specific needs. The goal is to recreate the nostalgic sounds of the Commodore 64 while taking advantage of the Raspberry Pi 4’s capabilities for an enjoyable and authentic experience.
So, whether you’re reliving childhood memories or discovering the wonders of the Commodore 64 for the first time, paying attention to audio configuration on your Raspberry Pi 4 will ensure that you’re immersed in a world where bleeps and bloops come alive, enhancing your journey into retro computing bliss.
Save States
One of the most convenient features when emulating the Commodore 64 on a Raspberry Pi 4 is the ability to save states. This powerful tool allows you to save your progress in a game or application at any point and then load it later, effectively creating checkpoints in your virtual Commodore experience.
In the past, playing games on the original Commodore 64 meant leaving your computer on for extended periods to ensure you didn’t lose your progress. With save states on the Raspberry Pi 4, this inconvenience is a thing of the past. Now, you can simply save your game state with a couple of button presses and resume right where you left off whenever you’re ready.
To utilize this feature, most Commodore 64 emulators for Raspberry Pi 4 provide a hotkey combination that triggers the save state function. Typically, it involves pressing a specific key or combination of keys (such as Ctrl + S) while in emulation mode. The emulator will then create a file that stores all relevant information about your current session.
This feature not only saves time but also adds flexibility to your gaming experience. You can experiment freely without worrying about losing progress or replaying levels from scratch. If you encounter a particularly challenging section in a game, simply create a save state before attempting it. This way, if things don’t go as planned, you can easily reload that specific point and try again without frustration.
Save states also come in handy when exploring software beyond gaming. Whether you’re using productivity applications or educational programs on your virtual Commodore 64, being able to save states allows for efficient multitasking and experimentation.
Moreover, save states are not limited to individual sessions. You can create multiple saves for different games or applications, enabling quick switching between them without losing any progress. This functionality adds convenience and enhances the overall user experience when using the Raspberry Pi 4 for Commodore 64 emulation.
So, take advantage of this powerful feature and embrace the convenience of save states when emulating the Commodore 64 on your Raspberry Pi 4. It’s a game-changer that ensures your progress is always preserved, allowing you to fully enjoy the nostalgia and excitement of this iconic computer system without any limitations.