
The C64 Raspberry Pi: A Perfect Blend of Nostalgia and Modern Technology
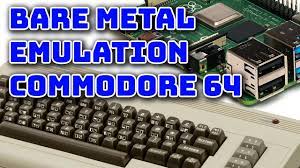
In the world of retro computing, few machines hold as much nostalgia and reverence as the Commodore 64 (C64). Released in 1982, the C64 became one of the best-selling home computers of all time, with its iconic design and impressive capabilities. Fast forward to today, and we find a unique blend of nostalgia and modern technology with the C64 Raspberry Pi.
The Raspberry Pi is a credit card-sized computer that has taken the tech world by storm. Its versatility, affordability, and compact size have made it a favorite among hobbyists, educators, and enthusiasts alike. But what happens when you combine this modern marvel with the beloved C64? You get an incredible fusion that allows you to relive the glory days while enjoying the benefits of today’s advancements.
With a C64 Raspberry Pi setup, you can recreate the classic computing experience on modern hardware. The Raspberry Pi acts as a powerful emulator for running C64 software, providing an authentic feel while also offering enhanced performance. It’s like having a time machine that transports you back to your childhood gaming sessions or coding adventures.
Setting up your own C64 Raspberry Pi is relatively straightforward. All you need is a Raspberry Pi board (such as the popular Raspberry Pi 4), an SD card loaded with RetroPie or other compatible emulation software, and a USB joystick or keyboard for controls. Once assembled, you’ll have access to an extensive library of classic C64 games and software that can be easily loaded and enjoyed.
But it doesn’t stop there. The beauty of the C64 Raspberry Pi lies in its expandability. With additional hardware attachments such as GPIO expansion boards or USB adapters, you can connect original peripherals like floppy disk drives or even use real vintage joysticks for an even more authentic experience. This flexibility allows enthusiasts to tinker and customize their setups to suit their preferences.
Beyond gaming, the C64 Raspberry Pi can also serve as a platform for learning and experimentation. With modern programming languages and development tools readily available on the Raspberry Pi, you can dive into coding, create your own games or software, and even explore the inner workings of the C64 itself. It’s a fantastic way to combine nostalgia with educational opportunities.
The C64 Raspberry Pi community is vibrant and active. Online forums, social media groups, and dedicated websites offer a wealth of resources, tutorials, and support for enthusiasts at all levels. Whether you’re a seasoned veteran or just starting your journey into retro computing, there’s always someone willing to help or share their experiences.
In conclusion, the C64 Raspberry Pi brings together the best of both worlds: the cherished memories of the Commodore 64 era and the power of modern technology. It offers a gateway to reliving classic gaming moments, exploring vintage software, and even diving into coding adventures. So why not embark on this nostalgic journey yourself? Dust off those vintage games and immerse yourself in the world of C64 Raspberry Pi!
Frequently Asked Questions: Commodore 64 and Raspberry Pi Combination
- What is the difference between a Commodore 64 and a Raspberry Pi?
- How do I set up a Commodore 64 with a Raspberry Pi?
- What are the best software and hardware for running Commodore 64 games on a Raspberry Pi?
- How can I connect my Commodore 64 to my Raspberry Pi?
- Are there any special considerations when using a Raspberry Pi to emulate the Commodore 64?
- What are some of the most popular projects involving the combination of a Commodore 64 and Raspberry Pi?
What is the difference between a Commodore 64 and a Raspberry Pi?
The Commodore 64 (C64) and Raspberry Pi are two distinct computing platforms with different origins, capabilities, and purposes. Here are some key differences between the two:
- Historical Context: The Commodore 64 was a popular home computer released in 1982, primarily known for its gaming capabilities and affordability during the early days of personal computing. On the other hand, the Raspberry Pi is a more recent creation, first introduced in 2012 as a low-cost, credit card-sized computer designed to promote learning and experimentation.
- Hardware: The C64 is a standalone computer with its own custom hardware architecture specifically designed for gaming and general-purpose computing. It has a dedicated keyboard, built-in sound and graphics capabilities, and supports various peripheral connections like joysticks, floppy disk drives, and printers. In contrast, the Raspberry Pi is a single-board computer that requires additional peripherals like a keyboard, mouse, monitor, and storage to function fully. It offers more modern hardware components such as USB ports, HDMI output for connecting to displays, GPIO pins for interfacing with external devices, and expandable storage options.
- Software: The C64 runs on its proprietary operating system called Commodore BASIC or can load software from floppy disks or cartridges. It has a vast library of games and applications specifically developed for it during its heyday. On the other hand, the Raspberry Pi can run various operating systems such as Raspbian (a Debian-based OS), Ubuntu Mate, or even retro gaming-focused distributions like RetroPie or Lakka. It supports a wide range of software applications available in the Linux ecosystem.
- Purpose: The C64 was primarily marketed as a home computer for gaming and general computing tasks like word processing or programming. Its focus was on providing an affordable yet capable machine for consumers at that time. In contrast, the Raspberry Pi was created to promote education in programming and electronics by offering an accessible and affordable platform for students, hobbyists, and enthusiasts. It encourages learning, experimentation, and DIY projects.
- Retro Emulation: While the C64 Raspberry Pi setup allows you to run C64 software through emulation, it is important to note that the Raspberry Pi is not a direct replacement for the original C64 hardware. The Raspberry Pi’s main purpose is to emulate various retro systems, including the C64, but it also offers much more versatility and functionality beyond just emulating a single vintage computer.
In summary, the Commodore 64 and Raspberry Pi are distinct computing platforms from different eras. The C64 is a classic home computer from the 1980s with its own dedicated hardware and software ecosystem, while the Raspberry Pi is a modern single-board computer designed for educational purposes with broader capabilities and flexibility.
How do I set up a Commodore 64 with a Raspberry Pi?
Setting up a Commodore 64 (C64) with a Raspberry Pi is an exciting project that allows you to enjoy the classic C64 experience on modern hardware. Here are the general steps to get you started:
Gather the necessary components:
– Raspberry Pi board (e.g., Raspberry Pi 4)
– MicroSD card (16GB or larger) with RetroPie or compatible emulation software installed
– USB joystick or keyboard for controls
– Optional: HDMI cable, power supply, and case for the Raspberry Pi
Prepare the SD card:
– Download and install RetroPie or a compatible C64 emulator onto your microSD card. You can find detailed instructions on the RetroPie website.
– Insert the microSD card into your Raspberry Pi.
Connect peripherals:
– Connect your USB joystick or keyboard to one of the USB ports on your Raspberry Pi.
– If using a monitor, connect it to the HDMI port on your Raspberry Pi. Otherwise, you can set up RetroPie to work in headless mode and access it remotely.
Power up and configure:
– Connect the power supply to your Raspberry Pi and turn it on.
– Follow the on-screen instructions to configure RetroPie settings, such as language, video output, and controller setup.
– Make sure to select “Commodore 64” as one of the emulators during setup.
Obtain C64 ROMs and software:
– To legally use C64 software, you’ll need original ROMs or legally obtained disk images in .d64 format.
– Transfer these ROMs or disk images onto your microSD card using a USB flash drive or by connecting your Raspberry Pi to a network for file transfer.
Launch C64 emulation:
– Once everything is set up, navigate to the game/emulator section within RetroPie and select Commodore
– Choose the game or software you want to play, and the emulator will launch it.
Customize and expand:
– Explore RetroPie’s settings to customize your C64 Raspberry Pi experience further.
– You can connect additional hardware, such as GPIO expansion boards or USB adapters, to use original peripherals like floppy disk drives or vintage joysticks.
Remember to consult the RetroPie documentation or online forums for more specific instructions and troubleshooting tips. Enjoy your C64 Raspberry Pi setup and have fun reliving the golden era of computing!
What are the best software and hardware for running Commodore 64 games on a Raspberry Pi?
When it comes to running Commodore 64 games on a Raspberry Pi, there are several software and hardware options available. Here are some of the best choices:
Emulation Software:
– Vice: Vice is a highly regarded emulator that supports multiple platforms, including the Commodore
It offers accurate emulation and a user-friendly interface.
– RetroPie: RetroPie is a popular software package for creating retro gaming systems on the Raspberry Pi. It includes Vice as one of its supported emulators, making it easy to set up and play C64 games.
Operating Systems:
– RetroPie: As mentioned earlier, RetroPie is an excellent choice for running C64 games on a Raspberry Pi. It provides a comprehensive gaming-oriented operating system with an easy-to-use interface.
– Lakka: Lakka is another retro gaming operating system that supports multiple platforms, including the Commodore
It offers a clean and intuitive interface for playing C64 games.
Controllers:
– USB Joysticks: You can use USB joysticks or gamepads to control your C64 games on the Raspberry Pi. Many classic-style USB controllers are available that mimic the design of original C64 joysticks.
– Original Commodore Peripherals: With the help of adapters like the Keyrah V2, you can connect original Commodore 64 peripherals such as joysticks or keyboards directly to your Raspberry Pi.
Additional Hardware:
– GPIO Expansion Boards: GPIO expansion boards like the Pi1541 or Ultimate-64 allow you to connect real floppy disk drives to your Raspberry Pi for an authentic C64 experience.
– USB Floppy Drive Emulators: Alternatively, you can use USB floppy drive emulators like the Gotek drive with custom firmware to load disk images onto virtual disks.
These software and hardware options provide a great starting point for running Commodore 64 games on a Raspberry Pi. They offer a combination of accuracy, ease of use, and flexibility to enhance your C64 gaming experience. Feel free to explore and experiment with different setups to find the combination that suits your preferences best.
How can I connect my Commodore 64 to my Raspberry Pi?
Connecting your Commodore 64 (C64) to a Raspberry Pi is a fantastic way to combine the nostalgia of the classic computer with the versatility of modern technology. Here are the steps to connect them:
- Obtain the necessary hardware: You will need a Raspberry Pi board (such as Raspberry Pi 4), an SD card loaded with RetroPie or other compatible emulation software, and a USB joystick or keyboard for controls.
- Prepare the Raspberry Pi: Insert the SD card with the emulation software into your Raspberry Pi. Connect the necessary peripherals like a monitor, keyboard, and power supply to the Raspberry Pi.
- Connect the video output: The C64 uses an analog video output called Composite Video. To connect it to your Raspberry Pi, you will need an RCA-to-HDMI converter or an RCA-to-Composite adapter cable. Plug one end of this cable into the C64’s video output port and connect the other end to your Raspberry Pi’s HDMI input or composite video input, depending on your adapter.
- Connect audio output: The C64 has a mono audio output port that uses a standard 3.5mm audio jack. You can connect this directly to your monitor or use an RCA-to-3.5mm adapter if needed.
- Power up both devices: Turn on your C64 and Raspberry Pi by connecting their respective power supplies.
- Configure RetroPie: Once your Raspberry Pi boots up, follow the on-screen instructions to configure RetroPie for first-time use. This involves setting up controllers, configuring display settings, and selecting appropriate emulator options.
- Load C64 games and software: With RetroPie configured, you can now load C64 games and software onto your Raspberry Pi. You can transfer them via USB drive or download them directly using RetroPie’s built-in Wi-Fi connectivity.
- Enjoy retro gaming on your C64 setup: Once everything is set up and your games are loaded, you can start playing C64 games on your Raspberry Pi. Use the USB joystick or keyboard you connected earlier to control the games and navigate through the RetroPie interface.
Remember, there are various online resources, forums, and communities dedicated to C64 Raspberry Pi setups. They provide detailed guides, troubleshooting tips, and additional customization options to enhance your experience. Don’t hesitate to explore these resources and connect with fellow enthusiasts for further assistance or to share your own experiences.
Are there any special considerations when using a Raspberry Pi to emulate the Commodore 64?
When using a Raspberry Pi to emulate the Commodore 64, there are a few special considerations to keep in mind:
- Compatibility: While the Raspberry Pi is a powerful device, it’s important to note that not all C64 software may run flawlessly on emulation software like RetroPie. Some games or programs may require specific configurations or additional tweaking to work correctly. It’s always a good idea to check compatibility lists and forums for any known issues or workarounds.
- Input Devices: The original C64 had its unique keyboard layout and joystick ports. When using a Raspberry Pi for C64 emulation, you’ll need USB adapters or compatible USB joysticks/keyboard options to replicate the authentic input experience. Ensure that your chosen input devices are compatible with the Raspberry Pi and the emulation software you’re using.
- Disk Images: The C64 used floppy disks as its primary storage medium. To emulate this functionality, you’ll need disk image files (usually in .D64 format) of the games or programs you want to run. These disk images can be loaded into the emulation software for use. It’s important to ensure that you have legally obtained these disk images or have created them from your own original disks.
- Performance Considerations: While modern Raspberry Pi models like the Raspberry Pi 4 offer impressive processing power, it’s worth noting that some complex C64 demos or games might push the limits of emulation performance. In such cases, adjusting emulator settings or exploring alternative emulators may help improve performance.
- Firmware Updates: The Raspberry Pi Foundation regularly releases firmware updates and improvements for their devices. Keeping your Raspberry Pi’s firmware up-to-date ensures that you have access to the latest features and bug fixes, which can enhance your C64 emulation experience.
- Cooling: Depending on how intensively you use your Raspberry Pi for C64 emulation, it may generate heat during extended sessions. Consider using proper cooling solutions like heat sinks or fans to prevent overheating and ensure optimal performance and longevity of your Raspberry Pi.
Remember, the C64 Raspberry Pi community is vast and supportive. If you encounter any issues or have questions, don’t hesitate to seek advice from online forums or dedicated communities. Embracing the spirit of exploration and tinkering will help you make the most out of your C64 Raspberry Pi setup.
What are some of the most popular projects involving the combination of a Commodore 64 and Raspberry Pi?
The combination of a Commodore 64 and Raspberry Pi has sparked the creativity of retro computing enthusiasts worldwide. Here are some of the most popular projects that showcase the potential of this fusion:
- C64 Emulation: The primary use of a C64 Raspberry Pi setup is to emulate the original Commodore 64 hardware, allowing users to play classic games and run vintage software. RetroPie, Vice, and other emulation software make it possible to recreate the C64 experience on modern hardware.
- Custom Game Consoles: Many enthusiasts have built their own handheld gaming consoles using a Raspberry Pi and a C64 emulator. These portable devices often feature custom-designed cases, built-in screens, and authentic C64-style controls for on-the-go retro gaming.
- Retro Arcade Cabinets: Combining the nostalgia of arcade gaming with the beloved C64, enthusiasts have created full-sized arcade cabinets powered by Raspberry Pi boards running C64 emulators. These cabinets feature authentic joystick and button setups, allowing players to enjoy classic C64 games in an arcade-style setting.
- DIY Disk Drive Emulation: The original Commodore 1541 disk drive was notorious for its slow loading times. Some projects involve using a Raspberry Pi as a disk drive emulator, allowing faster loading speeds by storing disk images on an SD card or USB drive.
- Music Synthesis: The SID (Sound Interface Device) chip in the Commodore 64 is renowned for its unique sound capabilities. With the help of a Raspberry Pi, enthusiasts have created MIDI interfaces that allow musicians to use original Commodore 64 synthesizer software or even create new music using SID-inspired sounds.
- Home Automation Systems: Leveraging the GPIO pins on a Raspberry Pi board, some projects involve integrating a Commodore 64-inspired interface into home automation systems. This allows users to control lights, appliances, and other smart devices with a touch of retro charm.
- Educational Projects: The combination of a C64 and Raspberry Pi provides an excellent platform for educational projects. From teaching programming and electronics to exploring computer history, enthusiasts have developed tutorials and educational resources to inspire the next generation of retro computing enthusiasts.
These are just a few examples of the diverse projects that have emerged from the combination of a Commodore 64 and Raspberry Pi. The possibilities are endless, limited only by the imagination and creativity of retro computing enthusiasts.