
The PiStorm: Reviving the Amiga 500
The Amiga 500 holds a special place in the hearts of retro computing enthusiasts. Released in 1987, it was a groundbreaking home computer that pushed the boundaries of multimedia capabilities. Decades later, the Amiga 500 still has a dedicated following, and one project is breathing new life into this iconic machine – the PiStorm.
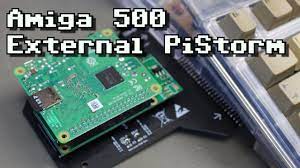
The PiStorm is an open-source project that aims to enhance and expand the capabilities of the Amiga 500 by leveraging the power of modern technology. At its core, it combines a Raspberry Pi single-board computer with custom hardware to create a powerful accelerator for the Amiga 500.
This innovative project allows users to enjoy faster processing speeds, expanded memory capacity, and improved compatibility with modern storage solutions. By connecting the Raspberry Pi to the Amiga’s expansion port, users can take advantage of its processing power while still maintaining compatibility with original software and hardware.
One of the most exciting features of the PiStorm is its ability to emulate other popular accelerator cards used in vintage Amigas. This means that users can experience enhanced performance similar to those provided by expensive and hard-to-find original accelerator cards. The PiStorm also supports additional features such as USB connectivity, Ethernet networking, and HDMI output, further expanding the possibilities for modernizing your beloved Amiga 500.
Installation of the PiStorm is relatively straightforward for those familiar with basic electronics. Once installed, users can take advantage of various software options available within the Amiga community to configure and optimize their systems according to their needs.
The PiStorm project has garnered significant attention from both long-time Amiga enthusiasts and newcomers alike. It offers an affordable way to upgrade aging hardware without compromising on authenticity or compatibility. Furthermore, this project has fostered a vibrant online community where users share their experiences, provide support, and collaborate on further developments.
Whether you’re a nostalgic fan looking to revisit your favorite Amiga games or a curious newcomer eager to explore the rich history of computing, the PiStorm is an exciting project that rejuvenates the Amiga 500 and brings it into the modern age. With its enhanced capabilities and expanding feature set, the PiStorm ensures that this beloved machine continues to captivate and inspire new generations of retro computing enthusiasts.
So, dust off your old Amiga 500, embrace the PiStorm, and embark on a journey filled with nostalgia, innovation, and endless possibilities. The future of the Amiga 500 is here, and it’s brighter than ever before!
Frequently Asked Questions about Upgrading Amiga 500 with Pistorm: Connecting to Modern Displays, Differences, Software Compatibility, and Performance Boost
- What is the best way to upgrade an Amiga 500 with a Pistorm?
- How do I connect my Amiga 500 to a modern TV or monitor?
- What are the differences between the original Amiga 500 and a Pistorm-upgraded version?
- Is it possible to run modern software on an Amiga 500 with a Pistorm upgrade?
- Does the Pistorm upgrade improve the speed of an Amiga 500?
What is the best way to upgrade an Amiga 500 with a Pistorm?
Upgrading an Amiga 500 with a PiStorm is an exciting project that can breathe new life into your beloved machine. Here’s a step-by-step guide on how to upgrade your Amiga 500 with a PiStorm:
- Gather the necessary components: You will need a Raspberry Pi single-board computer (preferably the Raspberry Pi 3 Model B or later), a compatible microSD card, a PiStorm adapter board, and any additional accessories you want to connect (e.g., USB devices, Ethernet adapter).
- Prepare the Raspberry Pi: Download the latest version of the Raspberry Pi OS (formerly known as Raspbian) from the official website. Follow the instructions provided to flash the OS onto your microSD card.
- Assemble the PiStorm adapter: Carefully connect the PiStorm adapter board to your Raspberry Pi, ensuring that all pins are aligned correctly and securely.
- Connect the adapter to your Amiga 500: Locate the expansion port on your Amiga 500 motherboard. Carefully plug in the adapter, ensuring that it is firmly seated.
- Power up and configure: Connect power to both your Raspberry Pi and Amiga 500. The Raspberry Pi will boot up, and you can follow its setup process to configure Wi-Fi, adjust display settings, and install any necessary software updates.
- Install necessary software on your Amiga: Within the Amiga community, there are various software options available for configuring and optimizing your system with a PiStorm. Explore forums, websites, or user groups dedicated to Amiga enthusiasts for guidance on which software packages work best for your needs.
- Test and enjoy: Once everything is set up and configured, it’s time to test out your upgraded Amiga 500! Load up classic games or applications and experience improved performance, expanded memory capacity, and enhanced compatibility with modern storage solutions.
Remember that this guide provides a general overview of the upgrade process. It’s always recommended to consult specific instructions, tutorials, and forums within the Amiga community for detailed guidance and troubleshooting tips.
Enjoy your upgraded Amiga 500 with the PiStorm and embrace the new possibilities that await you in the world of retro computing!
How do I connect my Amiga 500 to a modern TV or monitor?
Connecting your Amiga 500 to a modern TV or monitor requires a few additional steps due to the differences in video output technology. Here’s a guide to help you achieve that:
Check the available video outputs on your Amiga 500: The Amiga 500 typically has an RF (Radio Frequency) output and an RGB (Red Green Blue) output. The RGB output provides better picture quality, so if your TV or monitor supports it, it’s recommended to use this option.
Determine the video input options on your modern TV or monitor: Most modern TVs and monitors have HDMI, VGA, DVI, or DisplayPort inputs. You’ll need to check which input options are available on your specific device.
If your TV or monitor has an HDMI input:
– Purchase an HDMI converter that supports analog video signals. Look for converters specifically designed for retro gaming consoles.
– Connect the RGB output of your Amiga 500 to the HDMI converter using an appropriate cable.
– Connect the HDMI converter to the HDMI input of your TV or monitor using an HDMI cable.
– Power on both devices and select the corresponding HDMI input on your TV or monitor.
If your TV or monitor has a VGA, DVI, or DisplayPort input:
– Purchase a suitable adapter that converts RGB signals to VGA, DVI, or DisplayPort.
– Connect the RGB output of your Amiga 500 to the adapter using an appropriate cable.
– Connect the adapter to the VGA, DVI, or DisplayPort input of your TV or monitor using the respective cable.
– Power on both devices and select the corresponding input source on your TV or monitor.
If only RF output is available:
– Purchase an RF modulator that converts RF signals into composite video (yellow RCA) or coaxial (cable) connections.
– Connect the RF output of your Amiga 500 to the RF modulator using an RF cable.
– Connect the composite video or coaxial output of the RF modulator to the corresponding input on your TV.
– Power on both devices and select the appropriate input source on your TV.
Remember, the quality of the video output may vary depending on the conversion method used. If you’re looking for optimal picture quality, consider exploring other options such as a CRT monitor or a dedicated Amiga monitor that supports RGB input.
By following these steps, you should be able to connect your Amiga 500 to a modern TV or monitor and enjoy your retro computing experience with a clear and vibrant display.
What are the differences between the original Amiga 500 and a Pistorm-upgraded version?
The original Amiga 500 and a PiStorm-upgraded version offer significant differences in terms of performance, expandability, and compatibility. Here are some key distinctions:
- Processing Power: The original Amiga 500 featured a Motorola 68000 processor running at 7.16 MHz. The PiStorm upgrade replaces the original CPU with a Raspberry Pi single-board computer, which typically runs at much higher clock speeds (depending on the specific model used). This results in a substantial boost in processing power, allowing for faster execution of tasks and improved overall performance.
- Memory Expansion: The Amiga 500 originally had a maximum RAM capacity of 512KB, which was considered sufficient during its time. With the PiStorm upgrade, users can significantly expand the memory capacity by utilizing the Raspberry Pi’s RAM as additional memory for the Amiga system. This allows for smoother multitasking and better performance when running memory-intensive applications.
- Storage Options: The original Amiga 500 relied on floppy disk drives as its primary storage medium. However, with the PiStorm upgrade, users can take advantage of modern storage solutions such as SD cards or USB drives through the Raspberry Pi’s interface. This provides faster access times, larger storage capacities, and more convenient data transfer options.
- Compatibility: The PiStorm aims to maintain compatibility with original Amiga software and hardware as much as possible. While there may be some exceptions due to hardware differences between the original system and the upgraded version, efforts have been made to ensure that most software titles run seamlessly on the PiStorm-upgraded system.
- Additional Features: One of the notable advantages of the PiStorm upgrade is its ability to emulate other popular accelerator cards used in vintage Amigas, such as the Blizzard or ACA accelerators. This allows users to experience enhanced performance similar to those provided by these expensive and hard-to-find original accelerator cards. Additionally, features like USB connectivity, Ethernet networking, and HDMI output can be added to the Amiga 500 through the PiStorm upgrade, expanding its capabilities and providing modern connectivity options.
It’s important to note that while the PiStorm significantly enhances the performance and capabilities of the Amiga 500, it is still an upgrade and not a complete replacement for the original hardware. The PiStorm project aims to strike a balance between modernization and maintaining the authentic Amiga experience.
Is it possible to run modern software on an Amiga 500 with a Pistorm upgrade?
While the PiStorm upgrade for the Amiga 500 offers enhanced processing power, expanded memory, and additional features, it is important to note that the Amiga 500’s hardware limitations may still pose challenges when running modern software.
The PiStorm, with its Raspberry Pi integration, primarily aims to improve the performance and compatibility of the Amiga 500 with vintage software and games. It provides a significant boost in processing power compared to the original hardware, allowing for smoother operation and faster execution of tasks.
However, running modern software on an Amiga 500 with a PiStorm upgrade may still be limited due to factors such as memory constraints, storage limitations, and compatibility issues. The Amiga 500 was designed in an era when modern software requirements were vastly different from what we have today. Thus, more demanding applications or resource-intensive software may struggle to run optimally on this vintage hardware.
That being said, there are instances where certain lightweight or specially optimized modern software can be run on an Amiga 500 with a PiStorm upgrade. Some developers within the Amiga community have created adaptations or reimagined versions of popular applications that are tailored for retro computing systems like the Amiga.
Ultimately, while it is possible to run some modern software on an Amiga 500 with a PiStorm upgrade, it is important to manage expectations and understand the limitations imposed by the original hardware design. The primary focus of the PiStorm remains on enhancing compatibility with vintage software rather than providing full-fledged support for contemporary applications.
Does the Pistorm upgrade improve the speed of an Amiga 500?
Yes, the PiStorm upgrade significantly improves the speed of an Amiga 500. By utilizing a Raspberry Pi as an accelerator, the PiStorm provides a substantial performance boost to the Amiga 500’s processing capabilities.
The original Amiga 500 was equipped with a Motorola 68000 processor running at 7.16 MHz. With the PiStorm upgrade, users can enjoy much higher clock speeds, often reaching up to 100 MHz or more depending on the specific configuration. This increase in processing power allows for faster execution of software and smoother multitasking.
In addition to the increased clock speed, the PiStorm also offers expanded memory capacity. The original Amiga 500 had limited memory options, but with the PiStorm, users can add more RAM and take advantage of additional storage options such as SD cards or USB drives.
It’s important to note that while the PiStorm significantly enhances performance, it does not alter the Amiga’s architecture or software compatibility. This means that original software and games designed for the Amiga 500 will still run seamlessly on the upgraded system.
Overall, the PiStorm upgrade breathes new life into the Amiga 500 by boosting its processing power and expanding its memory capacity. It allows users to experience improved performance while maintaining compatibility with their favorite retro software and games.